

Please note: This an educational resource for the purposes of explaining how Uniswap works.
Since launching in 2018, UniswapGo to page https://uniswap.org/ has gained prominence as a popular decentralized exchange (DEX) and automated market maker (AMM). Since these are fairly complex topics, we thought it’d be helpful to dedicate some time to explain what they mean and how Uniswap works.
In this article, I will both introduce you to Uniswap and guide you through the process of porting Uniswap V2 to the Moonbase Alpha TestNet (as an example, not for ongoing use). It is divided into three main sections/topics:
- What is Uniswap?Go to page https://moonbeam.network/education/what-is-uniswap/#what-is-uniswap: A review and some terminology related to it before diving into the technical nits and bits.
- How to use UniswapGo to page https://moonbeam.network/education/what-is-uniswap/#how-to-use-uniswap: Covers the basics of the main smart contracts.
- Using Uniswap V2 on MoonbeamGo to page https://moonbeam.network/education/what-is-uniswap/#using-uniswap-on-moonbeam: A user’s guide to the Uniswap V2 version currently running on Moonbase AlphaGo to page https://moonbeam-swap.netlify.app/ which was deployed for example purposes.
I have also posted a walkthrough of how to port an example application like Uniswap v2 to Moonbase AlphaGo to page https://moonbeam.network/tutorial/deploying-uniswap-to-moonbeam/ or a Moonbeam standalone node. I’ll update this post with the link when it’s live. There is also an ERC20 token faucet on Moonbase AlphaGo to page https://moonbase-minterc20.netlify.app/ that you might need.
What is Uniswap?
The Basics of a Market Maker
Before we dive into Uniswap, it is important to understand what a Market Maker is.
Broadly speaking, market makers (MM) provide liquidity to the exchange they operate in, and they set “buy” and “sell” quotes for each asset. Therefore, they are the “source” of price discovery for trades. If a trader’s bid matches the offer of the MM, the trade is executed. Market maker’s earnings are usually tied to the spread, that is, the difference between their “buy” and “sell” prices. As the spread increases, the more they earn per trade executed.
How Uniswap Works
Uniswap is an automated market maker (AMM) protocol that relies on a series of smart contracts on top of Ethereum that automates this price matching (or price discovery) process. It allows its users to swap one token for another by interacting directly with the smart contracts, no intermediaries needed. Tokens need to be ERC20 compliantGo to page https://cointelegraph.com/explained/erc-20-tokens-explained or Eth (wrapped as an ERC20 with the WETH contractGo to page https://github.com/gnosis/canonical-weth/blob/master/contracts/WETH9.sol).
Liquidity providers (LP) can create these markets (called pools) by deploying them using the Uniswap factory contract. Once a pool is created, anyone in the ecosystem can provide liquidity to it. Liquidity providers earn a flat percentage fee according to their stake in the pool’s total liquidity. Shares of the pooled liquidity are accounted for using a liquidity token, commonly known as an LP token. You can think of each LP token as a share unit in the pool.
Automated market-making means that prices are set according to a mathematical formula and not by intermediaries. In the case of Uniswap, it relies on the XYK model, which uses the following equation:
x*y = k
Where x is the amount of one token (let’s call it Token X), y is the amount of the other token (let’s called it Token Y), and k is the product or constant.
Let’s go through a practical example. A pool was created with 1000 units of Token X and 1000 units of Token Y. That means that, for this example, k equals 1,000,000, and the initial price ratio between tokens is 1:1. Remember that k will remain constant. Consequently, if a user wants to deposit 10 Token X, the new amount of Token Y the pool needs to have can be calculated as:
new_y = k / new_x => new_y = 1000000 / 1010 = 990.1
This means that there is a surplus of 9.9 Token Y to keep the pool balanced (k constant). This is sent to the user who deposited the 10 Token X, which got a price of 0.99 Token Y per Token X. Therefore, the following table can be constructed (note that trading fees are not included):
Token X In | Approx. Token Y Out | Approx. Price (Token Y per Token X) |
1 | 1 | 1 |
10 | 9.9 | 0.99 |
50 | 47.6 | 0.95 |
100 | 90.9 | 0.91 |
200 | 166.7 | 0.83 |
500 | 333.3 | 0.33 |
From the table, it is clear that the higher the amount of tokens being traded, the lower the unit price is. The deviation from the ideal ratio (or price, which is 1:1 in this example) is part of the price discovery provided by an AMM.
But wait, how does this formula provide automated market-making? Remember that the math gives the price of the trade, and this creates arbitrage opportunities. Users can take advantage of imbalances in the Token X/Token Y ratio to get one of the tokens at a discount. This should always keep the pools balanced in an “automated” fashion.
And that is the basics of Uniswap. The protocol was publicly announced and launched to Ethereum MainNet in November 2018. Since then, it has grown to become the biggest DeFi project in the blockchain world. Uniswap had 130 billion dollars of all-time volume at the time of writing, with 4.56 Billion dollars of liquidity and a 24 hours volume of 1.28 billion dollars. All those numbers are in billions, with a “b.” It is crazy to think about the amount of money being locked in lines of codes. This shows the true potential of combining smart contracts, blockchain, and finance.
How to Use Uniswap
Basics of Uniswap V2 Contracts
As mentioned beforeGo to page https://moonbeam.network/education/what-is-uniswap/#what-is-uniswap, Uniswap relies on a series of smart contracts which define its automated market-making protocol. This section provides a brief overview of the main contracts that are part of the protocol.
Uniswap V2 Factory
The Uniswap V2 factory contractGo to page https://github.com/Uniswap/v2-core/blob/master/contracts/UniswapV2Factory.sol is arguably the core contract of the protocol. Its primary purpose is to create pools (called pairs in the contract). To do so, it uses the create2 opcode, which is capable of deploying contracts with deterministic addresses. This is useful to calculate the address of the pool of a pair of tokens (even off-chain). You can read more aboutGo to page https://hackernoon.com/using-ethereums-create2-nw2137q7 create2Go to page https://hackernoon.com/using-ethereums-create2-nw2137q7 in this articleGo to page https://hackernoon.com/using-ethereums-create2-nw2137q7. In short, to determine the address of the new pool (contract) to be deployed, create2 uses:
- The bytecode of the contract to be deployed (UniswapV2Pair)
- The address deploying the contract (UniswapV2Factory)
- A salt, calculated as the keccak256 of both ERC20 token addresses concatenated together
Once the pool is created, its address is stored with a double mapping that takes both token addresses as input (no matter which token address is first).
The pool creation occurs in the following lines of the createPair function:
bytes memory bytecode = type(UniswapV2Pair).creationCode; bytes32 salt = keccak256(abi.encodePacked(token0, token1)); assembly { pair := create2(0, add(bytecode, 32), mload(bytecode), salt) } IUniswapV2Pair(pair).initialize(token0, token1); getPair[token0][token1] = pair; getPair[token1][token0] = pair; // populate mapping in the reverse direction allPairs.push(pair); emit PairCreated(token0, token1, pair, allPairs.length);
Uniswap V2 Router 02
The routerGo to page https://github.com/Uniswap/v2-periphery/blob/master/contracts/UniswapV2Router02.sol is the smart contract used to interact with a pool. Routers are stateless, meaning they don’t hold token balances. Therefore, they can be replaced safely and in a trustless way for a more efficient router in the future. For example, the current router (02) is an upgrade from the first iteration (01).
This document won’t detail the code for all the functions inside the router contract. However, some of the essential functions to consider are:
- AddLiquidity: functions that handle adding liquidity to an already existing pool. As input, you provide the address of both tokens, the amount you want to provide, the minimum amount you are willing to provide, the address of the recipient of the resulting LP tokens, and the deadline (in UNIX timestamp). After some checks, the function calculates the optimal liquidity of one of the tokens for your input of the other. If it is above the minimum you specified, it will transfer those tokens to the pool and mints the corresponding LP tokens to the address specified.
- RemoveLiquidity: similar to the previous function, but handles the extraction of liquidity from an already existing pool. As inputs, you provide the address of both pool tokens, the number of LP tokens you want to burn, the minimum amount of tokens you wish to receive, the address recipient’s address of the tokens being withdrawn, and the deadline (in UNIX timestamp). After some checks, the function returns the LP tokens to the pool (to be burned) and transfers the corresponding pool tokens to the specified address.
- SwapExactTokensForTokens: as its name implies, this function calculates and withdraws a certain number of tokens for a given input amount. For example, let’s say a pool holds tokensA and tokensB, such as tokensA * tokensB = k. The amount of tokensB a user would withdraw from the pool (tokensBout) for a given input of tokensA (tokensAin) is given by the following equation:
tokensBout = tokensB - (k - tokensAin)
- SwapTokensForExactTokens: as its name implies, this function calculates the required input to withdraw a given number of tokens. For example, let’s say a pool holds tokensA and tokensB, such as tokensA * tokensB = k. The amount of tokensA a user would need to deposit into the pool (tokensAin) for a given output of tokensB (tokensBout) is given by the following equation:
tokensAin = (k / tokensBout) - tokensA
Each of the functions listed above also have a similar alternative but for pools where one of the assets is ETH (wrapped as WETH). In such cases, the user will send ETH, and the contract will handle the interaction with the WETH smart contract, either for minting, burning, or transferring tokens.
Uniswap V2 Pair
The contract represents the liquidity pool itself, and you can find it in this link. It holds the ERC20 token balance, mints/burns the liquidity token, and in general, handles all the liquidity pool logic.
To illustrate the deployment of Ethereum-based applications to Moonbeam, and in the process of creating a tutorial describing it, we deployed an example instance of Uniswap to Moonbase Alpha, the Moonbeam TestNet.
Bringing Uniswap V2 to Moonbeam was a three-step task: deploying the contracts, adapting the interface, and modifying the SDK. Deploying the contracts was super straightforward. Nothing needed to be modified at a protocol level. However, due to the create2 opcode (see earlier explanationGo to page https://moonbeam.network/education/what-is-uniswap/#uniswap-v2-factory) and not Moonbeam itself, a minor change needed to be made (more details in this blog postGo to page https://moonbeam.network/tutorial/deploying-uniswap-to-moonbeam/).
The interface and SDK were adapted to add support for the corresponding chain IDs of a Moonbeam standalone node and the Moonbase Alpha TestNet. Also, the new contract addresses needed to be included in the code.
A published version of the interface can be found at this linkGo to page https://moonbeam-swap.netlify.app/#/swap. The deployed interface works with both Moonbase Alpha and a standalone node via MetaMask (check the next section to get started with a standalone node).
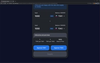
If “Moonbeam-swap” is connected to the correct network (standalone node in this case) via MetaMask, you should see the following screen:

If you’ve used the classic Uniswap V2 interface, this should feel familiar. From here, we can swap tokens, create pools, and add/remove liquidity from existing pools. In this case, let’s start a new pool of two ERC20 tokens: Token1 and Token2 (not super original names, I know).
To do so, go to the “Pool” menu and click on the “Add Liquidity” button. Here, you can select a list of default tokens (a list for the standalone node). If your token is not listed, you can add it by pasting its address on the search bar at the top.

Once you’ve selected the Tokens that will make up the pool, enter the number of tokens you want to provide as initial liquidity (remember that this sets the price).
Next, you need to approve the Router V2 as a spender for your ERC20 tokens. This is done via a transaction when you click on the “Approve” button for each token. Transactions are signed with MetaMask.
Once the approval is verified for both tokens, the “Supply” button should be enabled. Click that, confirm the details of your pool and select “Create Pool & Supply.” Sign the transaction with MetaMask.

Once the transaction is confirmed, your pool should appear in the “Pools” tab. Clicking on it will outline all its details and will also display buttons to add or remove liquidity. If the pool is not showing up, refresh the site and/or wait for a minute before retrying again. You can also use the “import pool” option at the bottom of the “Pool” tab.

With the pool ready, you can start swapping tokens and play around with the interface.
These steps can be done as well in Moonbase Alpha. But first, remember to deploy your ERC20 tokens.
Have fun :)!