


Transferring Tokens from Axelar to Centrifuge through Moonbeam’s Connected Contracts
Jan 13, 2023
18 min read
Share
Combining Moonbeam’s precompiled smart contractGo to page https://docs.moonbeam.network/builders/pallets-precompiles/precompiles/overview/ abilities to interact with Polkadot-specific tech with Axelar’s general message passing (GMP) allows for unique interactions that are not possible on other blockchains. Read on to learn how connected contractsGo to page https://moonbeam.network/builders/connected-contracts/ can send a token from an Axelar-connected EVM chain to a DeFi parachainGo to page https://moonbeam.network/education/what-is-a-parachain/ like Centrifuge by only interacting with a single chain.
This is more advanced than previous blog posts, so if you haven’t heard of Axelar yet, check out this introduction to AxelarGo to page https://moonbeam.network/blog/connected-contracts-axelar/, and Moonbeam’s recent blog post explaining the Axelar SDK.Go to page https://moonbeam.network/blog/axelars-sdk-connected-contracts/
Intro to Axelar Contracts
Axelar is a blockchain that connects blockchains, delivering secure cross-chain communication. Every validator in Axelar’s network runs light nodes on chains that Axelar supports. This dynamic validator set achieves consensus to confirm that messages are being sent from one chain to another by monitoring each chain’s Axelar gateway contract, which is one of the two Axelar contracts you will be interacting with later in the demo.
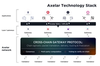
Image from Axelar NetworkGo to page https://www.axelar.network/blog/an-introduction-to-the-axelar-network
The other contract you will be working with is the Axelar Gas Receiver microservice. Whenever you use the Axelar gateway to send a cross-chain transaction, IAxelarGasReceiver lets you pay for the subsequent transaction on the destination chain. While not necessary, it allows the end user to only send one transaction to automatically update the destination chain, and to pay all transaction fees in the source-chain token they already hold.
Parachain Jumping
Axelar will help us get tokens from non-Polkadot chains to Moonbeam. But how will those bridged tokens get from Moonbeam to other parachains?
Moonbeam allows developers to create cross-chain (XCM) assets known as mintable XC-20sGo to page https://docs.moonbeam.network/builders/interoperability/xcm/xc20/overview/ that can be bridged to other parachains through Polkadot’s XCM messaging. These XCM assets act like normal ERC-20 tokens on the Moonbeam networks, so they can be minted, burned, and transferred with smart contracts. Using the XTokens precompiled smart contractGo to page https://docs.moonbeam.network/builders/interoperability/xcm/xc20/send-xc20s/#xtokens-precompile, developers can send these tokens to other chains using typical Solidity smart contracts.

Axelar has written a smart contract specifically for MoonbeamGo to page https://github.com/axelarnetwork/axelar-xc20-wrapper that wraps its bridged tokens into mintable XC-20, allowing Axelar’s tokens to reach the rest of the Polkadot ecosystem through Moonbeam. This contract has yet to deploy on the mainnet, but it serves as an example of how a wrapper contract can be used for bridged assets.
As mentioned before, Axelar is a bridge that lets users send tokens between chains. Axelar’s general message passing allows developers to connect contracts between chains so that a user can invoke a smart contract with a single transaction even when it’s not on the same chain. The important part is that you can use these two features at the same time.
In a single transaction, you will send a token from one chain to Moonbase Alpha, wrap it into a mintable XC-20, and finally use the XTokens precompile to send it across chains. In this case, you will be sending assets to a testnet handled by Centrifuge. Keep in mind that Centrifuge is only being used as an example.
The Connected Contracts
Connected contracts require two roles: a sender on an origin chain and a receiver on a destination chain. Many dapps may want to send the same type of message back and forth between chains, i.e. to seamlessly provide fungible liquidity across chains. It would make sense for these dapps to have the sender and receiver components in the same contract.
In this example, only one chain, Moonbase Alpha, will have the receiving functionality since no other Axelar-connected chain is a Polkadot parachain. Thus, there are two smart contractsGo to page https://github.com/jboetticher/axelar-parachain-hop to separate the sending and receiving logic.
ReceiveCrossChainXToken
First take a look at the destination chain (Moonbase)Go to page https://github.com/jboetticher/axelar-parachain-hop/blob/999f1cfca25b14da13b31a643b1115ce26196e02/contracts/CrossChainXToken.sol#L15 contract since it dictates the information that it expects to receive.
ReceiveCrossChainXToken inherits from IAxelarExecutableGo to page https://github.com/axelarnetwork/axelar-cgp-solidity/blob/main/contracts/interfaces/IAxelarExecutable.sol, which allows it to be called by the Axelar gateway. This parent contract has two overridable functions, _execute and _executeWithToken, that allow developers to change the logic when a contract receives a contract call from the Axelar gateway. Both functions have the same inputs, but _executeWithToken also includes tokenSymbol and amount to describe the token being sent cross-chain. The smart contract will expect to receive tokens so that it can wrap them into XCM assets, so it will override the _executeWithToken function.
This function receives a lot of information, but in this case, you’re only concerned with two pieces that Axelar provides: the payload and the amount of tokens being received.
The payload that Axelar sends to the receiver smart contract is general information from the sender contract serialized into a dynamic bytes object. The smart contract decodes the payload into two structs and one uint64, which will be used later in the XTokens precompile.
The rest of the logic is within a different function, wrapAndSendxUSDC. Separating the logic into another function isn’t necessary, but it also allows someone to wrap and send the mintable XC-20 on the origin chain if they wanted to.
You should also keep in mind that this contract only expects aUSDC. A more general contract may need to use additional parameters Axelar gives us to work with.
Now take a look at the bulk of the logic now that you’ve sorted out the initial information from the cross-chain message.
First, the contract approves Axelar’s aUSDC to be used by Axelar’s wrapper contract. Then, after some events to log progress, the contract allows the wrapper contract to wrap the aUSDC into xUSDC. Finally, after emitting another event and adjusting for a Polkadot quirk, the contract attempts to use the xTokens precompile to send an XCM message that transfers xUSDC to another parachain.
If you’re wondering why the adjustment was required, Polkadot has a system that requires local assets like xUSDC to have at least one “unit” of xUSDC to “keep the account alive.” This is why the smart contract keeps 1 “unit” of xUSDC if the amount of xUSDC in the contract is equal to or less than the amount that is about to get sent. This quirk is due to a safety feature of Polkadot that’s derived from a system that ensures that users don’t lose all of their assets accidentally, but in this case, it gets in the way a little bit.
That’s the complete breakdown for the smart contract on the receiving end. The next contract will be more straightforward, but take a water break if you need to. No need to rush!
SendCrossChainXToken
It’s been established what the Moonbase contract expects to receive, so now you have to write a contract to send that data. Take a look at the destination chain contract.Go to page https://github.com/jboetticher/axelar-parachain-hop/blob/999f1cfca25b14da13b31a643b1115ce26196e02/contracts/CrossChainXToken.sol#L82
There is only one relevant function in SendCrossChainXToken, sendxUSDCToParachain, which will interact with the AxelarGatewayGo to page https://github.com/axelarnetwork/axelar-cgp-solidity/blob/main/contracts/AxelarGateway.sol so that it can send a cross-chain message with a token. It will also use the IAxelarGasServiceGo to page https://github.com/axelarnetwork/axelar-cgp-solidity/blob/main/contracts/interfaces/IAxelarGasService.sol contract so that it can automatically pay for execution (gas) on the destination chain.
This function takes in the same parameters as the xTokens precompile since the caller essentially calls it from a different chain.
Then the contract will transfer the caller’s aUSDC from the caller to the contract so that Axelar’s gateway contract can remove aUSDC from this SendCrossChainXToken later. Note that the caller must approve the contract before this works, in practice likely only once.

Then the contract encodes the payload into a bytes object so that it can be decoded in the destination contract later. The encoding is in the same order as the decoding, but feel free to check yourself!
The next step is to pay for the gas on the destination chain. Since the plan is to send aUSDC from the destination chain along with custom data (the payload), the contract must pay for a contract call that also sends a token. In this implementation, the contract is going to pay for the destination chain’s transaction with the origin chain’s native currency.
The native currency is what a user pays for gas with. For example, I worked with the Fantom testnet as my source chain, so for me, the native currency was FTM. You can use the native currency to pay for gas on the destination chain, based on the conversion rates between the destination chain’s native currency and Moonbase Alpha’s native currency, which are based on their mainnet equivalents (Mainnet Fantom to Moonbeam).
So, putting it all together, since the smart contract is sending a contract call that includes a token and plans on paying for destination gas in DEV, the contract will be using the payNativeGasForContractCallWithToken function. Note that the contract uses the chain name “Moonbeam” instead of “Moonbase” because Axelar expects mainnet names.

Finally, the contract allows the gateway contract to take the token from the contract and send a cross-chain message.

Deploying Axelar Connected Contracts
There are a couple of prerequisites before you set up the repository. You will need access to a solidity wallet funded with:
- DEV from Moonbase Alpha’s faucet.Go to page https://apps.moonbeam.network/moonbase-alpha/faucet/
- An alternative Axelar-supported EVM chain’s native currency (see table below).
- aUSDC on the alternative native currency from Axelar’s Discord faucet.Go to page https://discord.com/invite/aRZ3Ra6f7D
Here is a table of a few EVM chains that Axelar supports with links to their testnet faucets:
Moonbase Alpha | |
Fantom Testnet | |
Mumbai | |
Avalanche Fuji |
Finally, you may want to make a testnet Centrifuge wallet. While you can send tokens to any preexisting wallet and monitor the resultant transaction, it’s best if you have control over the destination wallet in case you someday want to send the tokens back. Centrifuge has provided a testnet parachainGo to page https://polkadot.js.org/apps/?rpc=wss%3A%2F%2Ffullnode.moonbase-dev.cntrfg.com#/accounts that’s connected to Moonbase Alpha, which you can interact with on polkadot.js. If you don’t know how to make a wallet on Centrifuge, you can learn how with the polkadot.js extension hereGo to page https://www.youtube.com/watch?v=sy7lvAqyzkY.
Once you get your account, you’ll need its address in hex format. One easy way to do this is by copying the shortened address (should start with kA), opening up Shawn Tabrizi’s siteGo to page https://www.shawntabrizi.com/substrate-js-utilities/, and pasting the shortened address into the AccountId to Hex tool.

If you really don’t want to bother, you can always use the account that I used:
0x6a5a0c5de2400f2f0eccfaf65c765c40bd85af4e370e7da51f36942ed3546f24
Setting Up the Repository
At this point, you have a properly funded wallet and have chosen an Axelar-supported EVM chain to send cross-chain messages from. Now you get to start poking around with code!
Clone the following repository:
git clone https://github.com/jboetticher/axelar-parachain-hop.git
In the folder of the repository that you just cloned, you’ll need to create a new secrets.json file with your wallet’s private key in the following format:
{ "privateKey": "YOUR_PRIVATE_KEY" }
Great, everything should be set up for deploying!
Deploying with Scripts
To aid contract deployment, there are two scripts that are located in the scripts folder, destDeploy.js and originDeploy.js. They are very similar to ethers.jsGo to page https://docs.moonbeam.network/builders/build/eth-api/dev-env/hardhat/#deploying-the-contract deploymentsGo to page https://docs.moonbeam.network/builders/build/eth-api/dev-env/hardhat/#deploying-the-contract that you’ve likely done if you’re familiar with hardhat, so this post won’t be going over the code. Feel free to look at it on your own!
First deploy the destination chain contract on Moonbase Alpha by running the destDeploy.js script in the project’s main directory:
npx hardhat run scripts/destDeploy.js --network moonbase
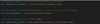
You should see something like the picture below. Be sure to copy the address that you deployed to and paste it somewhere safe. You’ll need it later!

Now you can deploy your origin chain contract on the Axelar-connected EVM of your choice. The repository’s hardhat.config.js file has many available networks, and various faucets were listed previously. The following command will deploy on the testnet and approve the deployed contract for 100 testnet aUSDC:
npx hardhat run scripts/originDeploy.js --network moonbase
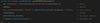
You should see an output something like the picture below. Once again, be sure to copy the address that you deployed.

Chain Hopping In Practice
Now take look at the parachain hopping itself. Or rather the script that starts it.
The relevant script is located in the scripts folder and is named axelarSend.js.
First things first: the configuration. You’ll need to change the script at the top to put in your destination chain address (Moonbase Alpha’s ReceiveCrossChainXToken) and your origin chain address (SendCrossChainXToken). This is why you saved those two addresses in the previous section!
You’ll also need to input your Centrifuge address in hex format, which you got when finding the prerequisites for deployment.
Then the script uses the Axelar SDK to estimate the destination chain gas fee. As developers, we must estimate the amount of gas to spend on the destination chain, because it is difficult to estimate a function that can only be called by a specific contract. In this case, the amount of gas is overestimated at 200,000. In an actual production environment, you may want to benchmark the amount of gas that you spend. However, if you do end up overestimating by a lot, you will get refunded by Axelar’s gas services.
The estimateGasFee function provided by the Axelar SDK will find the conversion between the origin chain’s native currency and the destination chain’s native currency to find the right amount to send to the destination chain.
If you’re taking a look at the implementation below and are wondering why the helper function testnetToMainnetChainName is used, it’s because Axelar expects the mainnet name (such as Moonbeam) instead of the testnet name (such as Moonbase Alpha).

Now take a look at the transaction that is sent to the origin chain:
At first glance the inputs might seem really wacky, but understanding it will require a brief explanation of Substrate (the toolchain Polkadot parachains are built on) and how the xTokens precompile on Moonbase Alpha works.
Substrate allows developers to build modular blockchains, which is how Polkadot gets its parachains. Each of these modules, which provide different features on different blockchains, are called pallets. When building a parachain, each pallet gets an ID: a pallet ID.
Polkadot allows each of these parachains to communicate with each other through their XCM technology. Each parachain needs an identifier: a parachain ID.
The xTokens precompile, the precompile contract that the ReceiveCrossChainXToken contract interacts with, isn’t made up of any solidity code. It’s actually baked into the parachain, and interacts directly with the xTokens pallet. To work, it needs data that Substrate understands (which isn’t similar to what you may be used to if you’re a Solidity developer). Each of the assets that the xTokens precompile manages has their own asset ID.
Ok, to sum it up: the sender contract is sending data that the xTokens precompile needs from an EVM chain to Moonbase Alpha using Axelar’s general message passing. The next step is to analyze the data that we’re sending the xTokens precompile.
The xTokens precompile functionGo to page https://github.com/moonbeam-foundation/moonbeam/blob/master/precompiles/xtokens/Xtokens.sol that we’re using in ReceiveCrossChainXToken is transferMultiasset. It takes in a Multilocation struct to represent an asset, a uint256 to represent the amount that you desire to send, another Multilocation struct to represent where we’re sending the funds, and a uint64 to represent weight.
Constructing a Multilocation is a little difficult to understand, which is why there is an entire sectionGo to page https://docs.moonbeam.network/builders/interoperability/xcm/xc20/send-xc20s/#building-the-precompile-multilocation in Moonbeam’s documentation dedicated to it. Take a look at the first Multilocation struct for the asset parameter:

The 0 value indicates that the location is relative to the current parachain. This makes sense because xUSDC is an asset originally registered on Moonbase Alpha, not a different parachain.
For the array of bytes, each entry’s first 4 bytes (two hexidecimal characters) indicate how to interpret the rest of the message.
So for the first entry, 0x04 indicates that the entry is a pallet ID. 0x24 equals 36, so together this first entry claims that the asset has to do with Moonbase Alpha’s 36th pallet, which turns out to be the xTokens pallet.
For the second entry, 0x05 indicates a general index, which will make sense in conjunction with the xTokens pallet. The rest of the entry, 0xFD9D0BF45A2947A519A741C4B9E99EB6, represents the asset ID of xUSDC, so xUSDC’s general index.
Moving on, the amount parameter is quite simple. 30000 xUSDC is equal to 30 cents. But you should take a closer look at destination:

In contrast to the asset parameter, the 1 value indicates that the location is not the same parachain. That makes sense since it would defeat the purpose of this project if you were only sending xUSDC around locally.
For the first entry of the array of bytes, 0x00 indicates that the entry is a parachain ID. 0x000007EF equals 2031, which unsurprisingly happens to be Centrifuge’s parachain ID on Moonbase Alpha’s test relay chain.
For the second entry of the array of bytes, 0x01 indicates a 32-byte address, which is what Centrifuge uses, hence why the CENTRIFUGE_ACCOUNT variable is appended directly afterwards. The additional 0x00 satisfies a formatting requirement.
The weight parameter is similar to gas on EVM chains, but has subtle differences that this post won’t go over now. If you’re interested, you can do some reading on Polkadot’s documentation siteGo to page https://wiki.polkadot.network/docs/learn-transaction-fees, but it’s completely fine to just use 1000000000 and call it a day.
The last two parameters don’t have to do with the xTokens precompile. You send the Moonbase Alpha address of ReceiveCrossChainXToken so that the contract knows where to direct the message to. Finally, the value that you send with the transaction will be used to pay for gas on the origin chain with Axelar’s gas receiver.
Sending And Monitoring The Transaction
Now that you understand the transaction and have properly configured the script, it’s time to send the transaction.
You can use two explorers to monitor the transaction. The first is Axelar’s testnet explorerGo to page https://testnet.axelarscan.io/gmp/search, which will give you an insight on the relevant activity on Moonbase Alpha and the origin chain. The second is polkadot.jsGo to page https://polkadot.js.org/apps/?rpc=wss%3A%2F%2Ffullnode.moonbase-dev.cntrfg.com#/explorer, which will allow you to query for changes in Centrifuge’s chain state.
Here is the format of the transaction, where NAME_OF_NETWORK is the network of your choice (look in the hardhat.config.js file’s network configurationGo to page https://hardhat.org/hardhat-runner/docs/config#available-config-options for the possible names of the testnet networks to use):
npx hardhat run scripts/axelarSend.js --network NAME_OF_NETWORK
Once you send the transaction, you should see something like this output in the console:
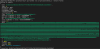
Copy the transaction hash because you’ll need it to monitor your transaction. Open up the Axelar testnet explorerGo to page https://testnet.axelarscan.io/gmp/search and paste the transaction hash into the search bar in the top right corner. This will take you to a page that will monitor the status of the transaction. If everything goes right, then eventually the transaction will be complete!
Open up polkadot.js for the Centrifuge testnetGo to page https://polkadot.js.org/apps/?rpc=wss%3A%2F%2Ffullnode.moonbase-dev.cntrfg.com#/explorer that’s connected to Moonbase Alpha. If you do this before the message is executed on Moonbase Alpha, you might catch an xcmpQueue event.
To check to make sure that everything worked properly or if you don’t see the xcmpQueue event, you can check the chain state to make sure that you’ve received the tokens.

Under the Developer tab, go to Chain state. You can query for your token balance with the ormlTokens pallet, where xUSDC is a ForeignAsset with ID 2. Note that the amount that results may not exactly match the amount that you originally sent (300000) since there are fees associated with parachain transfers.
At this point, if everything has gone well, you’ve completed the parachain hop! This template can be repeated for other parachains that will eventually use Axelar assets, and opens the doors for seamless transfer of assets between ecosystems.
If you need any help trying this out, I and the rest of the team will be in Moonbeam’s Discord channel.Go to page https://discord.com/invite/PfpUATX
Learn More About Connected Contracts
While Centrifuge will not be using an XC-20 wrapped aUSDC token on their mainnet, this technique will likely be used more as demand increases for new assets in the Polkadot ecosystem.
I encourage any curious readers to try their own hand at writing connected contracts with Axelar’s general message passing! There are plenty more use cases to take a shot at.
Learn more about Axelar on their websiteGo to page https://www.axelar.network/, and read about how Moonbeam is shaping up to be the leader in blockchain interoperability in our introduction to connected contracts.Go to page https://moonbeam.network/blog/cross-chain-smart-contracts/
If you are interested in MoonbeamGo to page https://moonbeam.network/ and want to learn more, subscribe to our newsletterGo to page https://moonbeam.network/newsletter/ and follow us on social (links in the page header).